Products
Products application serves for creating and managing products you will sell in your online store.
There are a several types of products you can create: standard products, master products (and their variants), events, vouchers and bundles. If some of them are not available in your account, you probably don’t have particular addon turned on. In this case, please contact our support.
In case you want to use Stock, you need to define it in the Administration module first.
Create a New Product
Click the New button and select the type of a product you want to create:
New Product - this is a normal product. These settings have nothing in common with the nature of it - physical (goods) or electronic (music, e-books). It can be defined later in the product’s settings.
New Master Products - this is a product which has some variants. It is used to unite similar products that are basically the same but differ in a variant (or variants).
New Event - this type is a ticket to an event (such as concert or sport event). As for the Products, its nature (physical or electronic) can be determined later. You can have both electronic and physical tickets (events). For more info about events see this help site. A special report is connected to events in the Sales module named Events. It displays various usable information about sold (an unsold) tickets. The settings for both these product types are the same, the difference is only in the processing of reporting.
New Voucher - this type is a gift card which code can be used on your online store. It means that you sell voucher codes in a form of a coupon code (a generated PDF document) which can be downloaded by customers in their profile.
New Bundle - this type allows you to unite a number of existing products to a new collection. A bundle acts like a standard product (you can set all information such as name, descriptions, price, …).
New Addon - Add-On is a special type of product that is not sold separately. They are sold as part of other products. In order to sell, you need to assign them to another product on the Relations tab.
New Gift – Gift is a special type of product that is given as a gift and cannot be purchased separately (cannot be purchased as an accessory, cannot be purchased via an external purchasing channel, may have stock (this is commonly used), may be a variant of the master product). The price of the gift must be set, otherwise it will be unavailable on the e-shop. This type of product can be added to the order manually in the administration when editing the order. You can work with it in the Gifts (set it as a gift), Prices and Price list Editor (to add a price) and Orders (order editing) applications.
General tab
General tab contains the base information about the product.
Note
Only the General tab is mandatory - you will be able to create a product if you fill in the required fields located on this tab. If you will not fill in the other tabs, you might not be able to use some BizBox functions, such as product image galleries and documents, proper function of delivery methods restrictions, displaying of product relations or listing of categories.
Identification
Name is a required field that is displayed to customers. Because this is the name of the product, you can also translate it. In case you want to add some language for translation, you need to go to the Administration module and add them in the Languages application.
Name in URL is a required field and contains the last part of the URL address of this product. You can customize it and the product will be accessible via this link. The final URL address affects also a catalog category you can set later on the catalog categories tab. The URL may contain “.”.
Code is a required field used for identification of this product. It can be used for selection of the product. Code has to be unique for all products within the BizBox Admin.
External ID is an optional field where you can insert the code that identifies the product in another system.
Comment is an optional field. It is internal information that serves only to BizBox administrators and will not be displayed to customers.
Configuration
Master Product is used to unite similar products that are basically the same but differ in a variant (or variants). For example, this can be a clothing in various sizes and colors. Master Product unites particular products from your catalog and you can use it on the website to display it as a single product with variants - for our example, customers can select color and size (and a particular single product from your catalog which has the required Custom Properties defined is selected). Search for and select one of the existing Master Products or create a new one. For more information visit the Master Products help-site.
Product Group allows you to select the product group to which you want to add this product. Every product group must be created previously in the product groups application or by clicking the green + button on the right side. Product group is important for the Custom Properties settings. In case you don’t add this product into product group or you add this product into product group without defined custom properties, you won’t be able to use and define the custom properties tab.
Manufacturer - In this field you can select the manufacturer of this product. Manufacturers are defined in the manufacturers application that is located in the products as well. It is used for better comfort when creating and displaying products - you define particular manufacturers for products you sell and then just select it for the particular product. It can be easily displayed to customers in the product detail.
Brand allows you to select previously created Brand.
Supplier allows you to select a previously created Supplier who is responsible for the product creation/dispatch. Suppliers can log into your e-shop (just like a typical customer) and display the suppliers’ portal (thanks to User Permissions). In this portal all orders which contains products connected with the particular supplier are available. The supplier can display them and resolve orders.
Validity Period
Validity Period settings are used to define the availability of a product. It is determined by Active and Archived flags.
In case you set the Active flag to NO, the product will be unavailable regardless of other settings (such as pricelists or stock conditions). Inactive products cannot be bought, and their detail can be displayed only when it is combined with the Archived setting set to YES. Inactive archived products cannot be bought, inactive non-archived products cannot be bought nor can be displayed.
If you want to restrict the validity of an active product, you can set an interval for which the product will be available. When you decide to use this, you have to set the Active flag to YES. Otherwise the product will be inactive regardless of the time period set below.
Archived setting is only used for inactive products. It will not influence the settings of an active product.
Active |
Archived |
Product Visibility |
Marketable |
|---|---|---|---|
NO |
NO |
Product cannot be displayed at all. If visitors display the detail of this product (they use the direct URL address), the 404 error page will be displayed instead. |
NO |
NO |
YES |
Only the product detail (visitors have to know the direct URL address). Used for SEO. |
NO |
YES |
NO |
Category, search results, product detail. |
YES |
YES |
YES |
Category, search results, product detail. |
YES |
Product Dispatch
Delivery Type determines the nature of the product as electronic or physical.
Delivery Service allows you to select how the product will be delivered to customers:
BizBox Electronical is used for products that are in an electronic form and that you will dispatch it automatically in BizBox Admin (with usage of Product URLs, Photobank or vouchers). See below. Electronic products can be sent automatically and the system will limit the choice of payment method on the website to online payments and bank transfer.
BizBox Manual is used for products you will dispatch manually. Orders of this product will be displayed in the Sales module in the Manual Dispatch application and you have to manually resolve it. After that you can mark it as delivered.
BizBox Stock is used for products that are dispatched by a stock. You need to define the particular stocks in the Administration module in the Stock Services application.
BizBox Electronical Dispatch - this type of a dispatch is used for products that are dispatched automatically by BizBox (BizBox will limit the choice of payment method on the website to online payments and bank transfer), such as images, gift cards (voucher codes), software (license keys) or product URLs. If you select this Dispatch Service, new setting fields appear:
Key Storage - here can be selected (or created by the green plus button) a key storage that will be used as a storage for codes/license keys that should be distributed to customers. For more info please visit the documentaion of Key Storage application which is located in the Administration module.
Coupon Card Template - here can be selected particular template for the PDF document that will be distributed to customers (download in user portal, e-mail attachment).
Coupon Card Image - select an image from the File Manager that will be used as the background in the coupon card template you selected above. This is not a required field.
Note
If the cart does not contain physical products, the delivery will be automatically removed from the cart (if the customer has already selected it).
Pricing
Pricing allows you to define a price category, to which this product belongs. Price categories are used to group products. If you have the Price Category addon enabled on your account, you can also set a price for all products in the price category. The particular price is set for all the products that belong to the price category in the Prices module. This can save your time and make the work with prices more transparent.
Price Categories have to have been previously created in the Price Category application located in the Prices module. The price for it is set in a particular pricelist (also in the Prices module).
Purchase Cost
Purchase Cost allows you to define the cost amount for this product. This information will be used to count orders costs and as a default cost value for receipts (the amount defined here will be used only as a default value which can be changed directly on the receipt).
Note
Cost values defined on a master product are used as a data source for its variants without defined costs.
Amout - Insert the product purchase price.
Gross Price - Define if the inserter amount is with or without VAT.
Tax Rate - Inset the tax rate (as a percentage) applied on the amount.
Currency - Select the amount currency.
Tags
Tags are keywords that are useful for grouping related products together and makes it easier for your customers to find similar products. Tags can also help you to define your product. You can add new tags by entering them (separated with commas) in the field. The suggestions are displayed automatically.

Tag Manager allows you to manage all tags you use - add new, edit and delete existing ones. Tags are common for all your products. Tag Manager is not used to connect tags with products, you have to use the Tag field.
Click the Tag Manager button located on the General tab and a new window will appear. Here, new or edited existing tags can be added. When add or edit a new window appears:
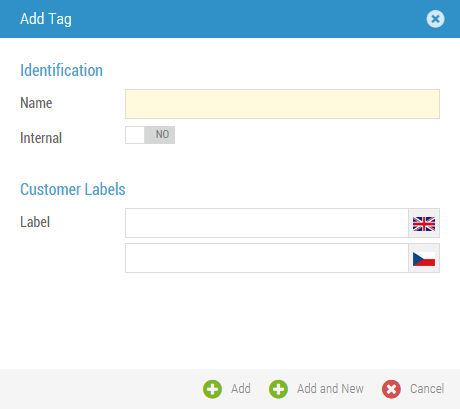
Name is the name of this tag that will be displayed to customers (visitors). This field can be translated.
Name In URL is a required field which contains the last part of the URL address of this tag. It is used on the website (in the URL addess) to display all products with this tag assigned.
Internal Name is unique system name.
Internal flag defines if the tag can be displayed on the website or is intended only for your internal purposes and customers (visitors) should not see it.
Tip
You can also add and remove tags with bulk actions.
To display tags on your website, use the component parameters {{ component.allTags }} or {{ component.productList.tags }}. For more info visit Product Catalog Component parameters help-site.
Tip
Currently used tag (from the URL address) is in the template of the product catalog component available as the component.tag parameter.
Description tab
The Description tab allows you to insert descriptions of the product. Particular fields can be displayed in the product detail or in confirmation e-mails. There are three types of descriptions you can fill in and use:
The Short Description is intended as a brief description of the product. It should provide the customer with basic information.
The Description should contain full information about the product. In case you want to add user manual or another documents, you can use the Product Documents tab.
Instruction is usually displayed to customers after they make a payment as a part of the Success Payment page or in the order/purchase confirmation e-mail.
SEO tab
The SEO tab allows you to define metadata for this product detail page. This information are used by search engines - Product Title, Product Description and Product Keywords.
These SEO settings will be displayed in the Product Detail view of the Product Catalog Component.
Product Title
Default – In the title will be used the Name of the product
None – In the Title will be displayed the complete URL address of the product
Specific Value – Activates the field below and you will be able to define your own title
Product Description
Default – The value is taken from the Short Description of the product (without HTML tags)
None – In the description will be displayed the complete URL address of the product
Specific Value – Activates the field below and you will be able to define your own description
Inventory tab
Inventory tab allows you to add some information about the product and stock.
Product Identification
EAN - the European Article Number; If you fill in an invalid EAN code, an information message will appear alerting you to this fact (an invalid EAN does not prevent saving).
Manufacturer Code
Unit: carton, cubic meter, kilogram, liter, meter, package, pallet, person, piece, quintal, square meter, tonne.
Serial Number
Origin defines the country of origin (create or edit particular values in the Product Origins manager - click the green plus button next to this field)
Storage Place
Package
Package defines the measurements, weight, volume snad material of the product. This can be important for the delivery services your customers can use, because some delivery methods can be limited by the measurements of the product (in dependence on the delivery service’s provider). It means, that delivery methods that are available for customer can be dependent on the package settings.
Note
You must enter the weight accurately if you want to use a weight calculation as a factor for offering delivery services.
Master Package
Here can be provided the information about the master (multi) pack.
Master Pack EAN is used in the Shipments application; if you insert (or scan) this EAN, particular Master Pack Quantity will be added to the shipment.
Master Pack Quantity is used in the Shipments application - if you use the Master Pack EAN instead of the product EAN, the defined quantity of products will be added to the shipment.
Master Pack Label
Master Pack Package
Master Pack Storage Place
Availability Settings
Availability Settings are used to define the product availability (visibility and the possibility of purchasing) state on your website. You don’t necessary need to use a stock to benefit from this setting.
Marketability determines the possibility of purchasing this product:
Always - the product can be added to the cart and bought always, regardless of its stock supply. It means that a customer can buy this product even if it is out of stock at the time.
Never - the product cannot be added to the cart (and bought) regardless of its stock supply. It means that a customer cannot buy it even if it is currently available on the stock.
Until Sold Out - the product can be added to the cart and bought according to its stock supply. If the product is out of stock (the current stock supply is 0), customers will be unable to add it to the cart.
The marketability setting does not affect the display (visibility) of the product in the Product Catalog component. To influence this, use the Activity setting on the first General tab.
Note
For manual order creation, all products are available regardless of their marketability type. It means that you can add a product with marketability type, set to never, to a manually created order.
Default Availability State defines the current stock availability. You can use it in preference to the real stock supplies. Value selected here can be displayed in the product detail with the {{component.product.inventory.availability.name}} parameter. Particular values are not influencing any other data. It is just information you provide to customers.
Available values are: In external stock, In stock, On request, Out of stock and Sold out.
Out of Stock Availability State is used in case the product is out of stock. These states are not displayed automatically, you need to insert the {{component.product.inventory.outOfStockAvailability.name}} parameter in the Product Catalog Component. Particular values are not influencing any other data. It is just information you provide to customers.
Available values are: In external stock, In stock, On request, Out of stock and Sold out.
The product current availability is in the template available in the currentAvailability parameter.
For a product which is currently on stock, the Default Availability State is returned. For a master product this value is returned in case there is at least one of its variant on stock.
For a product which is currently out of stock, the Out of Stock Availability State is displayed. For a master product this value is returned in case there is not a single variant on stock.
Note
You can select particular e-shops in which the product will be available thanks to the E-shop Constraints setting.
Tip
On the product object is the isBuyable property available. Use it in the website’s code as part of the condition which allows/denies your customers to add a product to the cart.
Products Availability Table
Active Setting
Value |
Standard Product |
Bundle |
Master Product |
Variant (normal) |
Variant (extended) |
Variant Bundle |
|---|---|---|---|---|---|---|
YES |
Active. |
Active. |
Taken from particular variants. |
Active. All variants of inactive master are inactive. |
Active. All variants of inactive master are inactive. |
Active. |
NO |
Inactive. |
Inactive. |
Inactive (variants are inactive). |
Inactive. |
Inactive. |
Inactive. |
Archived Setting
Value |
Standard Product |
Bundle |
Master Product |
Variant (normal) |
Variant (extended) |
Variant Bundle |
|---|---|---|---|---|---|---|
YES |
Archived. |
Archived. |
Archived. |
Taken from the master. |
Archived. |
Archived. |
NO |
Unarchived. |
Unarchived. |
Unarchived. |
Taken from the master. |
Unarchived. |
Unarchived. |
Marketability Setting
Value |
Standard Product |
Bundle |
Master Product |
Variant (normal) |
Variant (extended) |
Variant Bundle |
|---|---|---|---|---|---|---|
Always |
Always. |
Always. |
Cannot be set up. |
Always. |
Always. |
Always. |
Until Sold Out |
Until Sold Out. |
Until Sold Out. |
Cannot be set up. |
Until Sold Out. |
Until Sold Out. |
Until Sold Out. |
Never |
Never. |
Never. |
Cannot be set up. |
Never. |
Never. |
Never. |
Availability Settings
Standard Product |
Bundle |
Master Product |
Variant (normal) |
Variant (extended) |
Variant Bundle |
|---|---|---|---|---|---|
Inserted value. |
Inserted value. |
Inserted value. |
Taken from the master. |
Taken from the variant. |
Inserted value. |
Minimum Required Stock Quantity allows you to set the minimum stock of the product. If the number of products in the stock falls below this limit, the notification (Insufficient Stock Quantity and/or Insufficient Stock Quantity After Order Creation) will be sent. Note that the notification must be set in the Notification application in the Administration module.
The entered value is applied globally for all the stocks on which this product is. If you want to enter different values for different stocks, please use the button Settings for Stock located in the toolbar.
Evaluation order: #. If the product has the stock setting (Settings for Stock), it will be used. #. If not, the Minimum Required Stock Quantity (tab Inventory) will be used.
For variants:
If the variant has the stock setting (Settings for Stock), it will be used.
If not, the stock setting (Settings for Stock) set on its master product will be used.
If there is no stock settings on the master product, the setting from the variant’s Inventory tab will be used.
If there is no setting on the variant’s Inventory tab, the setting from the master product’s Inventory tab will be used.
Note
If you use the Minimum Required Stock Quantity setting and the current stock drops below the set limit, the stock supply will be marked with a red icon.
Customs
In this section you can fill in the data for customs clearance (may be required for foreign shipments; for example for JAPO carrier).
Googs Description – verbal description of the product
HS Code – customs nomenclature - unique identifier of the type of goods.
Stock Inventory
The Stock Inventory section is available for accounts which use stock management. Here a table which contains information about the stock supply of the product is displayed.
You can see the product name, particular stock, availability (how many product is available for purchase on the online store), reserved (the number of products that are currently on the stock but have been already purchased - for more information about reservations please visit Working with Orders help-site) and on stock (the total count of products that are on the stock).
If the addon Stock Product Batch enabled is enabled on your account, the working with batches is available. Two more columns are displayed: Product Batch and Expiration Date. In these columns, you’ll find information about batches. Each batch has its own row in the stock table. When the order is created, products from the stock without a defined batch are reserved. When you create a shipment (the order is sent to stock), the issue is created. When issuing, as first are used the products with the lowest expiration date. Furthermore, products stored without the batch are used after the products from batches with no expiration date.
Action button on the right side allows you to display:
Stock Card - complete inventory movements for the product / batch.
Reservations - a list of orders that holds a reservation for the product. If unavailable, no reservations exist.
Locations - available for stock with locations enabled.
Customer Alerts
Customer Alerts allows you to display all customer alerts for this product. Click the Display Customer Alerts button and a new window will appear. Here are all available alerts displayed. For a master product, the alerts for its variants are displayed.
To add a new alert manually, click the Add button. For a master product you have to select a particular variant for which will be the alert added.
Custom Properties tab
Custom Properties tab contains the properties you have defined for the product group of this product. In case you don’t select a product group for this product or you don’t define custom properties for it, you won’t be able to select and define the particular properties for the product. Otherwise you can fill in the properties for this product here. Custom properties defines specifications and variants of the product. This can typically be a color, size or type of a certification.
Tip
You can use the search box located at the top of this tab. It allows you to search in product’s custom properties by their name or value.
Tip
You can set a tooltip for particular custom property (when you place the cursor over a custom property name). Just provide particular custom property with a comment. Go to the Product Groups application and edit particular product group. On the Custom Properties tab edit particular custom property and add a comment.
Prices tab
Prices tab allows you to define the price of the product directly from the product edition. On this tab are directly edited pricelists which exist in the Pricing module. It means that you don’t need to go to the Pricing module at all and you will be able to set the price as a part of the product edition.
All you need is an existing pricelist, without it you will be unable to define the product price, because every price must be added to a pricelist.
On the Prices tab all pricelists in your account are available. Click in the cell in the Price column and insert the price of this product (together with the Product Tax Category (highest one is used as a default) and Gross Price (default value is taken from the pricelist settings) setting). For the Regular pricelist type, the Base Price is available. Save the product. All changes made on this tab are automatically performed in the Pricing module in the particular pricelists which you have changed here. Click on the pricelist name and the editing for it will be opened on a new browser tab.
Tip
Use the Rebuild Prices button in the toolbar to work with/view the newly added prices in the website preview. The Convert Prices button is available only for automatically generated pricelists. Use it to calculate the prices immediately - typically when you add a new price to the source pricelist and you want to project this change to the calculated pricelist as well. For these actions job is scheduled. Please wait a moment.
If you need to create another one, you have to go to the Pricing module and create a new pricelist here.
On the Prices tab, volume prices can be added. For more info please see the volume prices section.
To add a new volume price, edit an existing price. In a new window you can click the Add button and fill in the From Quantity and Price. If the inserted quantity is in the cart, it will be applied to one unit of this product.
Relations tab
Relations tab allows you to define related products. There are four groups of relations you can create.
Alternate Products should contain products that are an alternative to the product you are creating/editing. These alternatives can be displayed to a customer along with this product.
Cross Selling Products should contain products that are additional to the product you are creating/editing. For example: If the product you are creating/editing is a laptop, you can offer a mouse, keyboard and other accessories. These products can be displayed to a customer along with this product.
Up Sell Products should contain more expensive products or upgrades for the product you are creating/editing. These products can be displayed to a customer along with this product.
Accessory should contain accessories of this product.
For relations you can define a symmetric relation. Symmetric relation automatically adds the relation for both products – for the edited one the selected product will be added. And for the selected product the currently edited one will be added as the relation of the same type.
Note
Alternate Products to a product can be displayed in its detail by the component.product.relations.alternatives parameter. Similarly other relationship types.
Add-Ons (Sales of accessories)
If you want to sell accessories that are not sold separately, you must create an Add-On product (for example, optional gilding of the product). You then set each Add-On to the product on the Relations tab. The Grouping field is used for Add-Ons. Enter text that combines individual Add-Ons (product type) into one group. An item from one group can then be selected just once.
An Add-On product cannot be purchased separately, but only as an accessory to another product to which it is set.
On the Relations tab the Allow Any Accessory setting is available. Option YES = any buyable product from the catalog can be bought as an accessory of this product. Option NO = only products that are listed as Accessories (on the Relations tab) can be bought as accessories of this product.
You must customize the templates to use the Add-Ons on the web:
Add product with Add-On to the cart: use the API Cart with the accessories parameter.
Display prices in the cart: the cart contains the price of the product including accessories. To display the price per item (product/Add-On) only, the mainPrice (cartItem.mainPrice) object is prepared that encapsulates all prices (product and Add-On).
In the Order (and Placed Order) object is the mainPrice/mainItems parameter also available.
When updating the number of units in the cart, in the case of a product with accessories, the accessories are added according to the coefficient and rounded up. That is, every other unit is added with accessories when the number of pieces in the cart changes. Example: There is 1 piece of product in the cart and it has 2 pieces of accessories. On the cart page, the quantity of the product will be changed to 3 pieces. As a result it will have 6 pieces of accessories.
Catalog Categories tab
Catalog Categories tab allows you to select the categories to which the product belongs. Categories are used in the Product Catalog Component, which allows you to display all products from the selected category and also with the product catalog content page. In case you want to edit categories, you have to use the category tree application located also in the Products module.
Click the particular category to which you want this product assigned. There are 2 options for how the product will be displayed on the website:
Single Product displays a separate product. This is used for normal products and master products. If you select this for a variant product, it will be displayed without any connection to other variants.
Variant Product - Master can be used only for variants. It is used to define the main variant from all other variant products. It will be displayed in the category as a representative product for all other variants.
Default Category
Every product can have a default category assigned. Only one default category per product can be set.
The default category is used:
for searching (WebAPI) where the link for the searched product is created,
for the canonical URL (parameter request.page.canonicalUrl) in the product catalog,
in the getViewLink() function to determine the product’s category,
for redirect (301) to the default category if a URL refers to a category in which the product is not assigned.
The order of evaluation for the default product category is as follows:
product default category,
first product category,
default category of the product’s master product,
first category of the product’s master product.
Relevance
You can set the relevance in a given category by clicking in the Relevance column on the Catalog Categories tab. Ascending order in the category (on the website) begins with products without relevance, and the last is the product with the highest relevance value. Descending begins with the product with the highest relevance value and ends with products without the relevance set. If the product belongs to more than one category, the priority is taken from the least submerged category.
Product Images tab
The Product Images tab serves for adding images of the product. There are three types of images you can add. There are no restrictions about its count, size or anything else. You can define the displaying of them by editing the product catalog component. An image can be used for all languages or only for the one that you select in the Language field. Every image you use has to be uploaded to the File Manager first.
If you want to change an existing record, click the particular cell and edit it. You don’t need to open editing. You can also change the order of particular records by using the drag and drop function.
Click the Add button and select the image type you want to add (Big Image, Gallery Image or Small Image). In the File Source select a particular file from the File Manager. If you use an external file source, select its setting below and provide the path to the image file within the selected external source. You can also click the search button and a manager for external sources will be displayed. According to the external file source settings (Read Only) can be particular images uploaded and selected.
The Bulk Add button allows you to add several Gallery Images at once.
Product Documents tab
The Product Document tab allows you to add various documents to this product. There are four types of Documents you can use: Certificate, Technical Specification, User Manual and Generic Document. You can also add this document as an attachment to the Purchase Confirmation E-mail. Every one of these documents needs to be uploaded in the File Manager.
If you want to change an existing record, click the particular cell and edit it. You don’t need to open editing. You can also change the order of particular records by using the drag and drop function.
To display for example a Generic Document 1 in the product detail, use the component.product.documents.genericDocuments1 parameter. Similarly other relationship types. See the example:
{% for document in component.product.documents.genericDocuments1 %}
        <a href="{{document.src}}" target="_blank">{{document.name}}</a>
{% endfor %}
If the Paid Content addon is enabled, in the document settings on the Configuration tab the Paid Content setting is available. If you want to sell this document in your online store, set this setting to YES. This document will be available for download in the order detail (for paid orders only).
To make the sold content downloadable for customers in the order detail, use the API getboughtcontent for download or following parameters of the order products (available in the order detail):
isDownloadable - boolean; set to YES if the product has a downloadable content available.
boughtContent - array; productDocument contains particular object of the product document.
downloadLink - string; generated link (WebAPI) for document download.
If purchased content can be downloaded, the parameter allBoughtContentDownloadLink is available on the order (it contains a link for bulk download of all bought documents from the order). Bought content is available in the template with user.orders.boughtContent parameter.
Product URLs tab
The Product URL tab allows you to connect URL addresses to this product. You can add:
Full Version Download
Demo Download
Manufacturer Website
Review
Video URL
Other
If you want to change an existing record, click the particular cell and edit it. You don’t need to open editing. You can also change the order of particular records by using the drag and drop function.
Advanced tab
The last Advanced tab allows you to set up:
Other Product Parameters
Warranty
Define the product warranty in months. This information does not influence any behavior of this product. You can display it on your online store in the product detail (in the product component use the parameter component.product.warranty).
Allow Any Accessory
The setting is used when you sell accessories for your products. Option YES = any buyable product from the catalog can be bought as an accessory of this product. Option NO = only products that are listed as Accessories (on the Relations tab) can be bought as accessories of this product.
New From Date
With this setting you can specify when the product should be considered new - so with this setting you can overload the real date of creation of the product. In the web settings in the Product Offerings application, it is possible to set the number of days for which products should be considered new. The date of creation of the product is taken as decisive. With the New From Date setting, you can specify the date from which the product should be considered new. This setting also affects the filtering and sorting of products by creation.
Cart Constraints
Minimum Quantity - you can numerically set the minimum number of items of this product that your customer can buy. A customer won’t be able to place an order which does not contain the defined minimal quantity of this product.
Maximum Quantity - you can numerically set the maximal number of items of this product that your customer can buy. A customer won’t be able to place an order which contains more than the defined maximal quantity of this product.
In case you want to control the number of all items in the shopping cart or the total amount of the order, you have to go to the Administration module in the E-shop Settings application. Here (on the last Advanced tab) you can set limits for the shop as a whole and not only for one particular Product.
You can also use the Product Group constraints to control the number of products on an order.
Product Relevance
Relevance
Relevance is used to influence this product’s display (its order) in the Product Catalog Component (Product List View - products from selected category are displayed). In the component settings, (Items Sort) the default sorting (price, name, code, category or relevance) can be defined. Relevance will be taken from this field, a higher number means higher relevance. It is kind of a marketing tool because you can set up the sorting according to your needs. It means you can promote your products by displaying them higher in the list of products from one category.
Tip
If you set up the Relevance and the current sorting won’t be according to that relevance (it can be a price for example), relevance will still influence the product sorting like a second condition. If there are 2 (or more) products with the same price, the product with higher relevance will be displayed first. If the sorting will be according to a category, products with higher priority will be displayed first.
In the field, one number on the scale 1-1000000 can be assigned which influences its order in results of the Product List view (products from one category or search results). A higher number means higher priority, in case the number is the same for more products, they will be ordered at random.
Relevance can also influence the search results for variant (master) products if you use the Group Master Products setting in the Product Component Catalog. In such a case, the product with the highest priority will be displayed as the variant master (other will be grouped as its variant alternatives). This allows you to “select” the variant master product in the search results, because there are no categories in searching so BizBox is unable to work with a category settings.
Subscription
To work with subscription orders you need to have the Order Subscription addon allowed on your account.
Period
Select the subscription period. It defines how often will be a subscription order which contains this product automatically re-created.
Trial Period
This setting allows customers to try the product for free (you set a specific number of days for which the product will be available for free). Once the trial period has expired, a normal (customer-paid) subscription order is automatically created.
When adding a trial period product to the cart, it is checked if the customer has ever purchased the product. If so, the customer will not receive a trial.
Before placing an order, it is checked again whether the customer is eligible for the product trial period. If not, it is removed from the cart and the customer receives a message.
Checking the purchase of a product with a trial period is only performed for logged-in customers, because the order history is available here.
Delete a Product
You can delete a single product or delete multiple products at once using the delete button located in the toolbar. When you delete a product, it is permanently removed from BizBox. Deleted products cannot be restored after the project is approved (otherwise you can delete/revert the project which contains this change).
Products which are currently on stock cannot be deleted. Please issue all units of the product first.
Note
If you run out of stock or no longer want to display a product on your online store, you can just deactivate it on the General tab. You can also set that products which are currently out of stock won’t be displayed on your online store.s
Bundles
New Bundle creates a group of previously created Products that are represented and sold as one.
Note
To work with bundles, you need to have the bundle addon available for your account. Feel free to contact our support for more information.
In the Products application click the New button and select the New Bundle option.
All tabs and settings are the same as when creating a new Product. The only difference lies in the second Bundle Content tab where you select particular products that creates the bundle together.
Click the Add button and search for a product (using its name, code or EAN) you want to add to the bundle. You can add a single product, product variant and/or master product as well. In the Quantity field insert how many units of this product will be added to the bundle. For a master product, the product variant constraint can be added: if you want to restrict variants of this master product, you can select particular Custom Property and one of its variants. Only products (selected master product’s variants ) which have this variant assigned will be added to this bundle.
To the bundle you can add as many products as you want to.
Note
Bundles can also be imported (productType = bundle). The content of a bundle cannot be imported and has to be defined on the Bundle Content tab manually.
Note
If a master product is selected, customers have to select particular variant they wish to buy. See the Add Product to the Cart form. When creating an order manually, you have to select particular variant as well.
Bundles and Stock Condition
A bundle cannot be received on the stock. You can receive only particular products which the bundle contains.
If a bundle’s marketability is set to Until Sold Out and it contains a product which is currently out of stock, the bundle won’t be available to buy. For an order which contains a bundle reservations are created for particular products of the bundle.
Products Import and Export
Products Export
You can simply export products from your Products application. There are huge possibilities of export settings. You can export the catalog as a whole or export only a defined part of it - according to the applied filters, languages or particular selected tabs.
Go to the Products module and run the Products application. Here, the Export button is located in the toolbar. Before you click it, you need to decide what exactly you want to export. If you want only your own products selection, you need to define it first with the proper filtering. It means that you have to apply filters in particular columns according to the products you want to export. Only the products you have filtered through the columns (displayed products) will be exported.
When you are done with filtering (or you don’t want to use filters in the export), click the Export button located in the toolbar. A new window appears. Here you will set up the whole export. Export File Type defines the file type of the exported file. You can use XLSX or XML file - it depends only on your needs.
Tip
See the excel product import column names.
Product Tabs defines which tabs will be exported. For example, if you want to export only names, mark only the General tab and nothing else within this group. It just depends on which data you want to export, subsequently change and import back.
Note
You will not be able to export only prodcuts names. In case you will select only a General, all information from the General tab will be exported.
Languages defines what languages will be exported. The languages are offered according to the Languages you have added in the Administration module.
If you have applied some filters before and want to export only those, select the Filtered Only option in the last Products selection. The All will export all products regardless the filters applied before.
Include All Variants setting is for Master products only. Do you want to export all their variants together with them? If not, only the Master product will be exported. If the variants are part of the export (filter, selection, all products), their export will of course take place regardless of this setting.
When you are done, click the Export button and save the exported file to your computer.
Now you can edit it and create all changes you want to. When you are done, you can import it back. We assume that you did not change the names of particular columns so there will not be any problems with the proper formatting.
Note
For a bundle product cannot be imported its master product. It is an invalid combination, bundles cannot have master products.
Products Import
It is not necessary to create products manually in the Products application. You can simply use the import. Product Import allows you to create new products and also edit the existing ones. To be able to import products, you need to have a well-formed XLSX or XML file that describes them.
Tip
See the excel product import column names.
Note
The best way how to get the well-formed file is to download it directly from BizBox using the export function.
We recommend you export the products before the creation of the import file, because thanks to this you will get a well-structured file you can only edit and import back. With this the file structure will not be an issue for you. For more information about the names of particular columns in your import XLSX file see the list below.
Note
Languages are very important in the products. For most columns in the import you have to define also their language.
In the Import File Type select the file type of the file you are going to import (Excel or XML).
Select the particular file below and select the Import Type.
In case you are importing new products (products that are not a part of your Products yet), you can also set its default values used to describe the Product Type, Delivery Type, Delivery Service, Unit and Marketability used. These settings will be used as a default for all newly imported products. Remember that if you want to import new products, you have to allow the “Insert” Select Type Import - otherwise new products cannot be imported.
Insert - This option will insert all products (or bundles) that are newly defined in the imported file. It means that they are not added in the products. This option will add it to it. It affects only the products (bundles) that are not a part of the Products but are defined in the imported file. All updated and missing products in the imported file will be ignored.
Update - This option affects only the records that are already defined in the Products. All missing or new products in the imported file will be ignored.
Delete - A product (or bundle) which is not included in the imported file, but exists in the products, will be deleted. It affects only products that are defined in the products but are not part of the imported file. All new or updated rows in the imported file will be ignored.
List of Column Names
Colum Name |
Description |
|---|---|
code |
Required, insert unique product code. |
name:en |
Required, insert unique product name that will be displayed to customers. The en defines language of this column. In case you have a multilingual website, you have to insert the name (and other language dependent columns) in more languages. Change the language suffix - such as name:cs. |
nameUrl:en |
Optional, insert unique URL address of this product (the last part of it, probably its name). |
productGroup |
Optional, insert the internal name of a product group to which this product belongs. |
deliveryType |
Optional, insert the delivery type (physical, electronic). |
deliveryService |
Optional, insert the delivery service (bizboxManual, stock, bizboxElectronical). |
brand |
Optional, insert the internal name of an existing brand. |
active |
Optional, insert 0 for unactive and 1 for active product. If you will not define this column, the product will be imported as active. |
archived |
Optional, insert 0 for non-archived and 1 for archived product. |
validFrom |
Optional, insert date from which is this product valid (active). Example: 2015-09-08 00:00:00. |
validUntil |
Optional, insert date until which is this product valid (active). Example: 2015-09-08 00:00:00. |
manufacturer |
Optional, insert the internal name of a manufacturer. |
supplier |
Optional, insert the internal name of a supplier. |
tags |
Optional, insert internal name or | separated internal names of existing tags that will be assigned to this product. |
productType |
Optional, insert product for single product (or variant), event for events, master for master products, bundle for bundles, gift for gifts. |
externalId |
Optional, insert the external ID of the product. |
priceCategory |
Optional, insert the internal name of the price category to which you want to assign this product. |
purchasePrice |
Optional, insert the purchase price of this product; all purchasePrice values have to be defined to import the product purchase price. |
purchasePriceTaxRate |
Optional, insert the tax rate applied on the purchase price; all purchasePrice values have to be defined to import the product purchase price. |
purchasePriceGrossPrice |
Optional, defines if the inserted purchase price is with (1) or without (0) tax included; all purchasePrice values have to be defined to import the product purchase price. |
purchasePriceCurrency |
Optional, defines the purchase price currency (such as CZK, EUR); all purchasePrice values have to be defined to import the product purchase price. |
eshop:available:ESHOP-INTERNAL-NAME |
Optional, this is a boolean value (0,1). Instead of ESHOP-INTERNAL-NAME please use a real internal name of the e-shop settings for which you want to import this setting. |
eshop:freeshipping:ESHOP-INTERNAL-NAME |
Optional, this is a boolean value (0,1). Instead of ESHOP-INTERNAL-NAME please use a real internal name of the e-shop settings for which you want to import this setting. |
eshop:additionalLoyaltyPoints:ESHOP-INTERNAL-NAME |
Optional, this is the Additional Loyalty Points value in the Settings for E-shop section. Instead of ESHOP-INTERNAL-NAME please use a real internal name of the e-shop settings for which you want to import this setting. Instead of ESHOP-INTERNAL-NAME please use a real internal name of the e-shop settings for which you want to import this setting. |
eshopcarrier:service:ESHOP-INTERNAL-NAME |
Optional, this column has to contain internal names of particular delivery methods separated by |. Instead of ESHOP-INTERNAL-NAME please use the internal name of the e-shop settings for which you want to import this setting. It is used to define the Delivery Methods Restrictions for a product (Settings for E-shop). |
eshopspecialcarrier:specialService:ESHOP-INTERNAL-NAME |
Optional, this column has to contain internal names of particular delivery methods separated by |. Instead of ESHOP-INTERNAL-NAME please use the internal name of the e-shop settings for which you want to import this setting. It is used to define the Special Delivery Methods for a product (Settings for E-shop). |
eshopcurrency:additionalLoyaltyPoints:ESHOP-INTERNAL-NAME |
Optional, define all currencies and loyalty points you want to import for the defined e-shop settings - currency:loyalty points separated by |. Example: EUR:2|CZK:1|HUF:3. Instead of ESHOP-INTERNAL-NAME please use a real internal name of the e-shop settings for which you want to import this setting. |
description:en |
Optional, insert long description of this product (you can use HTML tags). |
shortDescription:en |
Optional, insert short description of this product (you can use HTML tags). |
instructions:en |
Optional, insert instructions of this product (you can use HTML tags). |
seoTitle:en |
Optional, insert the SEO title for this product. In case you will not define this column, the name of the product will be used instead. It will be displayed on the product detail page of this product. |
seoDescription:en |
Optional, insert the SEO description for this product. In case you will not define this column, the short description of the product will be used instead. It will be displayed on the product detail page of this product. |
seoKeywords:en |
Optional, insert the SEO keywords that will be displayed on the product detail page of this product. |
seoTitleSource |
Optional, define from where will be taken the SEO title source (default, specific, none). In case you will not define this and seoTitle columns, the default will be used automatically. If you define this column and define the seoTitle column, the specific will be used automatically. |
seoDescriptionSource |
Optional, define from where will be taken the SEO description source (default, specific, none). In case you will not define this and seoDescription columns, the default will be used automatically. If you define this column and define the seoDescription column, the specific will be used automatically. |
ean |
Optional, insert the EAN code (Inventory tab). |
manufacturerCode |
Optional, insert the manufacturer code (Inventory tab). |
marketabilityType |
Optional, insert the marketability type (always, never, until-sold-out). |
unit |
Optional, define the unit (kilogram, litre, meter, pallet, person, piece or squareMeter) of this product (Inventory tab). |
weight |
Optional, define the weight of the product (Inventory tab). |
volume |
Optional, define the volume (Inventory tab). |
height |
Optional, define the height (Inventory tab). |
width |
Optional, define the width (Inventory tab). |
depth |
Optional, define the depth (Inventory tab). |
length |
Optional, define the length (Inventory tab). |
material |
Optional, insert the internal name of an existing material (Inventory tab). |
masterPackEan |
Optional, insert the master pack ean (Inventory tab). |
masterPackQuantity |
Optional, insert the quantity of products in master pack (Inventory tab). |
masterPackLabel |
Optional, insert the label of the master pack (Inventory tab). |
masterPackPackage |
Optional, insert info about the master pack package (Inventory tab). |
masterPackStoragePlace |
Optional, insert info about the master pack storage place (Inventory tab). |
snAgenda |
Optional, serial agenda (Inventory tab), value ‘0’ turns serial agenda off, value 1 on. If you will not define this column, value 0 will be used automatically. |
availability |
Optional, default availability state (Inventory tab). Values: currently-unavailable, in-external-stock, in-stock, on-request, out-of-stock or sold-out. |
outOfStockAvailability |
Optional, out of stock availability state (Inventory tab). Values: currently-unavailable, in-external-stock, in-stock, on-request, out-of-stock or sold-out. |
goodsDescription |
Optional, Goods Description (Customs – Inventory tab). |
hsCode |
Optional, HS Code (Customs – Inventory tab). |
stock:minimumRequiredLevel:STOCK-INTERNAL-NAME |
Optional, defines the minimum required quantity for the stock. Instead of STOCK-INTERNAL-NAME please use the internal name of the stock for which you want to import this setting. |
alternateProducts |
Optional, defines the alternative products. Use their codes separated by the vertical bar. Example: 1234564|5454545. |
crossSellProducts |
Optional, defines the cross sell products. Use their codes separated by the vertical bar. Example: 1234564|5454545. |
upSellProducts |
Optional, defines the up sell products. Use their codes separated by the vertical bar. Example: 1234564|5454545. |
accessoryProducts |
Optional, defines the accessory products. Use their codes separated by the vertical bar. Example: 1234564|5454545. |
masterProduct |
Optional, available only for product variants; defines particular master product (by its code) to which this variant belongs. |
categoriesSingle |
Optional, defines particular categories to which will be this product added as a single product. Use internal names separated by the vertical bar. Example: clothing|skirts|sale. |
categoriesVariant |
Optional, defines particular categories to which will be this product added as a variant product. Use internal names separated by the vertical bar. Example: clothing|skirts|sale. |
defaultCategory |
Optional, defines the default category of the product. Fill in the internal name of the selected category. |
bigImages |
Optional - big images, defines path to an image stored in the File Manager (you can insert more images separated by the vertical bar). Example: /website/images/image1.png|/website/images/image2.png. |
smallImages |
Optional - small images, defines path to an image stored in the File Manager (you can insert more images separated by the vertical bar). Example: /website/images/image1.png|/website/images/image2.png. |
galleryImages |
Optional - gallery images, defines path to an image stored in the File Manager (you can insert more images separated by the vertical bar). Example: /website/images/image1.png|/website/images/image2.png. |
certificate |
Optional - product documents (certificate), defines path to a file stored in the File Manager. Example: /website/files/certificate.pdf. |
technicalSpecification |
Optional - product documents (technical specification), defines path to a file stored in the File Manager. Example: /website/files/specification.pdf. |
userManual |
Optional - product documents (user manual), defines path to a file stored in the File Manager. Example: /website/files/manual.pdf. |
genericDocument1 |
Optional - product documents (generic document 1), defines path to a file stored in the File Manager. Example: /website/files/document.pdf. |
genericDocument2 |
Optional - product documents (generic document 2), defines path to a file stored in the File Manager. Example: /website/files/document.pdf. |
genericDocument3 |
Optional - product documents (generic document 3), defines path to a file stored in the File Manager. Example: /website/files/document.pdf. |
demoDownload |
Optional - product URLs, defines a full path to a demo download of this product. By adding a language abbreviation (: en), it is possible to specify the language for which the value is imported. |
fullDownload |
Optional - product URLs, defines a full path to a full download. By adding a language abbreviation (: en), it is possible to specify the language for which the value is imported. |
reviewUrl |
Optional - product URLs, link to the product review. By adding a language abbreviation (: en), it is possible to specify the language for which the value is imported. |
videoUrl |
Optional - product URLs, link to a product video (YouTube, Vimeo, …). By adding a language abbreviation (: en), it is possible to specify the language for which the value is imported. |
manufacturerWebsiteUrl |
Optional - product URLs, link to the manufacturer website. By adding a language abbreviation (: en), it is possible to specify the language for which the value is imported. |
otherUrl |
Optional - product URLs, other URL address. By adding a language abbreviation (:en), it is possible to specify the language for which the value is imported. |
warranty |
Optional - advanced tab, defines the value of warranty. |
allowAnyAccessory |
Optional - advanced tab, boolean. value 1 = any buyable product from the catalog can be bought as an accessory of this product. Value 0 = only products that are listed as Accessories (on the Relations tab) can be bought as accessories of this product. |
minimumQuantity |
Optional - advanced tab (Minimum Quantity), defines the minimum quantity of the product that can be added to the cart. |
quantityLimit |
Optional - advanced tab (Maximum Quantity), defines the maximum quantity of the product that can be added to the cart. |
relevance |
Optional - advanced tab, defines the value of relevance that can be used for product list sorting (range 1-1 000 000 ). |
custom:NAME:en |
Optional - custom properties. Instead of NAME insert the internal name of a custom property you want to import. As a value insert the value of the custom property. If you want to import values for the multiple product variants type, you must separate the individual values with a vertical bar (|). |
extraEntities |
Optional - internal names of extra entities separated by the vertical bar. Example: internal-name1|internal-name2. |