Pricelists
How to Price a Product
This tutorial will show you how to set a price for a product. It follows-up the How to Create a Pricelist tutorial and it’s expected that you have already created a base pricelist. If not, follow please How to Create a Pricelist before this one.
You need some prerequisites in order to be able to finish this tutorial successfully. You need pricelist, products and taxes (especially the product tax category defined). Products are created in the Products module and taxes are set up in the Administration module.
There are 2 applications where you are able to change (or add) the product price:
Pricelists application
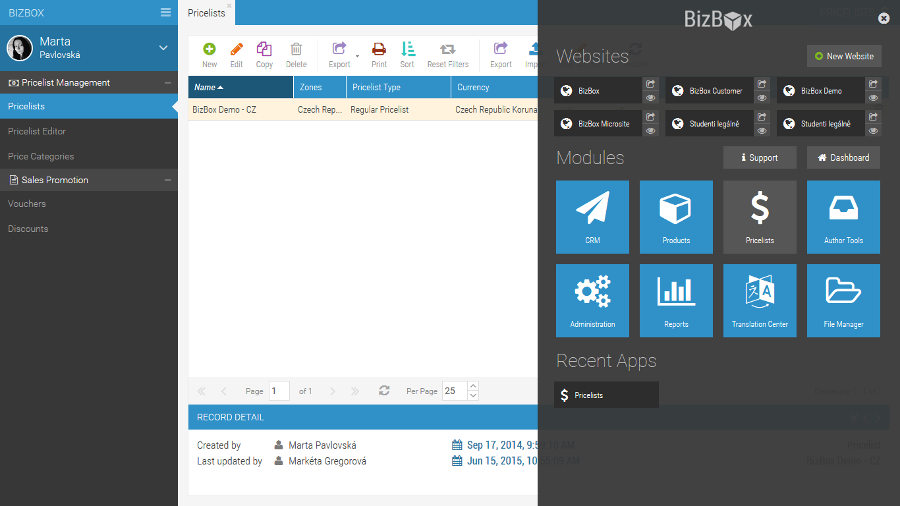
Open (edit) a particular Pricelist in which you want to set a price for a product. Pricelists are located in the Pricelists application in the Pricing module. A double-click on a particular pricelist (or Edit button located in the toolbar) record opens it.
The second tab Products allows you to price particular products. This is the only tab we will be working with in this tutorial.
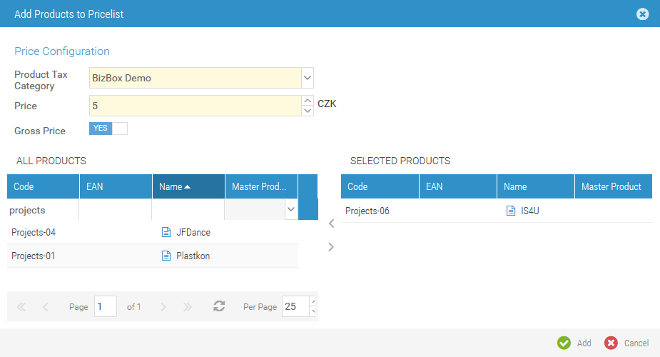
Click the Add button and select the Product Tax Category. This category determines the tax that will be applied on products that you will select below.
In the Price field insert the price (currency of the price is defined for the whole product list with its creation) that will be charged for Products you will select below. The Gross Price flag determines, if the inserted price has included taxes (option YES). With option NO you insert the price without taxes included and the final price will be automatically calculated in order to connect taxes to Product Taxes category.
And now you can add products to which you want to set the price you defined above. Use filtering to find the product (or products), select it and click on the little arrow. Products displayed in the Selected Products column will be priced after you approve it by clicking the Add button.
Repeat steps 3-5 until all products which you want to sell on your online store have the price defined.
Click the Save button and your pricelist is ready.
Approve your project.
If you want to change price for some product, locate it, double-click it and you are able to edit it.
Pricelist Editor
Pricelist Editor is used to perform a quick add or change of a product price.
Run the Pricelist Editor application and in the selectbox above select particular pricelist on which you want to change the price.
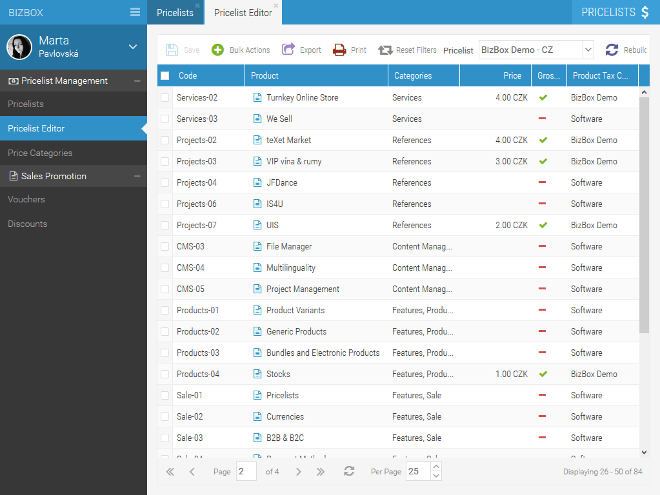
In the grid are displayed all products from your catalog (the products which are currently defined in this pricelist have displayed the price. For products that are not defined in this pricelist is the cell with price blank).
Click on the price cell for particular product and fill in the new price.
Click the Save button located in the toolbar.
Approve your project.
Note
If you want to see changed prices in the preview of your online store, you have to regenerate the pricelist.
How to Price a Payment Method
This tutorial will show you how to set price for a Payment Method.
All payment methods from your checkout are available for selection by your customers regardless of its pricing definition. It means that you don’t need to define a price for payment method in order to make it available to your customers. Unpriced payment methods will be automatically for free. Only when you want to set a fee for it, do you need to add it here.
To finish this tutorial successfully you need to have previously defined the Payment Method you want to use within this pricelist.
Open (edit) a Pricelist in which you want to set a price for a Payment Method. Pricelists are located in the Pricelist application in the Pricing module. A double-click on a particular pricelist (or Edit button located in the toolbar) record opens it.
The fifth tab Payment Methods allows you to price particular Products. This is the only tab we will be working with in this tutorial.
Click the Add button and select a Payment Method for which you want to set a price.
Select a Product Tax Category. This category determines a tax that will be applied on selected method.
Set the price that will be charged for this method.
Min and Max Order Value fields are optional and you can use it to limit the usage of this method. Set the minimal order value that your customer must pay in order to be able to use this method. Analogical with the Max Order Value field. If a customer doesn’t fit into this interval, the price will not be charged.
The Gross Price flag determines, if the inserted price has included taxes (option YES). With option NO you insert price without taxes included and the final price will be automatically calculated in order to connect taxes to the Product Taxes category.
Click the Add button and the method’s price will be on the list.
Repeat the steps 3-9 until all methods which you want to use on your online store have the price defined.
Click the Save button and your pricelist is ready.
Approve your project!
Note
If you want to see changed prices in the preview of your online store, you have to regenerate the pricelist.
How to Price a Delivery Method
This tutorial will show you how to set price for a Delivery Method.
Pricing of a Delivery Method is important. Without it your customers won’t be able to select and use it. Every Delivery Method you want your customers to use has to be priced. In case a Delivery Method is free of charge, you still need to price it with the “0” price.
To finish this tutorial successfully you need to have previously defined the Delivery Method you want to use within this pricelist.
Open (edit) a Pricelist in which you want to set a price for a Delivery Method. Pricelists are located in the Pricelist application in the Pricing module. A double-click on a particular pricelist (or Edit button located in the toolbar) record opens it.
The fourth tab Delivery Methods allows you to price particular Products. This is the only tab we will be working with in this tutorial.
Click the Add button and select a Delivery Service for which you want to set a price. A list of connected methods will be available in the field below. Services available here are all services you have added in the Administration module. If you want to change this listing, you need to change it in the Administration module.
Select a particular Delivery Method for which you will set the price.

Select a Product Tax Category. This category determines a tax that will be applied on selected method.
Set the price that will be charged for this method.
Min and Max Order Value fields are optional and you can use it to limit the usage of this method. Set the minimal order value that your customer must pay in order to be able to use this method. Analogical with the Max Order Value field. If a customer doesn’t fit into this interval, the method will not be available for selection.
The Gross Price flag determines, if the inserted price has included taxes (option YES). With option NO you insert price without taxes included and the final price will be automatically calculated in order to connect taxes to the Product Taxes category.
Click the Add button and the method’s price will be on the list.
Repeat the steps 3-9 until all methods which you want to use on your online store have the price defined.
Click the Save button and your pricelist is ready.
Approve your project!
Note
If you want to see changed prices in the preview of your online store, you have to regenerate the pricelist.
How to Price a Handling Method
This tutorial will show you how to set price for a Handling Method.
Pricing of a Handling Method is important. Without it your customers won’t be able to select and use it. Every Handling Method you want your customers to use has to be priced. In case a Handling Method is free of charge, you still need to price it with the “0” price.
To finish this tutorial successfully you need to have previously defined the Handling Method you want to use within this pricelist.
Open (edit) a Pricelist in which you want to set a price for a Handling Method. Pricelists are located in the Pricelist application in the Pricing module. A double-click on a particular pricelist (or Edit button located in the toolbar) record opens it.
The sixth tab “Handling Methods” allows you to price particular handling methods defined for stocks you use. This is the only tab we will be working with in this tutorial.
Click the Add button and select a Stock Service for which you want to set a price. A list of connected methods will be available in the field below. Services available here are all services you have defined in the Administration module. If you want to change this listing, you need to change it in the Administration module.
Select a particular Handling Method for which you will set the price.
Select a Product Tax Category. This category determines a tax that will be applied on selected method.
Set the price that will be charged for this method.
Min and Max Order Value fields are optional and you can use it to limit the usage of this method. Set the minimal order value that your customer must pay in order to be able to use this method. Analogical with the Max Order Value field. If a customer doesn’t fit into this interval, the method will not be available for selection.
The Gross Price flag determines, if the inserted price has included taxes (option YES). With option NO you insert price without taxes included and the final price will be automatically calculated in order to connect taxes to the Product Taxes category.
Click the Add button and the method’s price will be on the list.
Repeat the steps 3-9 until all methods which you want to use on your online store have the price defined.
Click the Save button and your pricelist is ready.
Approve your project!
Note
If you want to see changed prices in the preview of your online store, you have to regenerate the pricelist.
How to Create a New Pricelist
Pricelists are created in the Pricing module. Pricelist is essential for your online store, because it determines prices for the products you sell. Without it you will not be able to sell anything. Pricelist is also necessary in the process of creating your online store because it allows you to preview your products (Products Module) and to test its functions.
Are there any prerequisites I need to fulfil before I will be able to create a complete pricelist?
Yes. You need to define:
Particular products (and/or events) for which you will set the price. Products are created in the Products module.
Currency in which you are going to sell your products.
Taxes and Charges which define the taxing. They are set in the Administration module.
Payment and Delivery Methods which determine the payment and delivery methods prices and availability for customers.
Optionally the Stock Services in case you want to use Stock to dispatch an order.
If you miss some of these, visit their help-sites and create them according to our tutorials. Otherwise you will not be able to define a complete pricelist.
Make yourself sure you have them all defined before you will start creating a Pricelist:
To create a new pricelist, run the Pricing module.
Click the Pricelists application and the New button located in the tool bar.
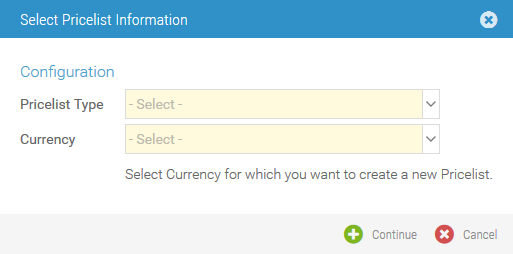
Select the Pricelist type. Regular is a standard pricelist used to define usual prices.
Define the currency of the pricelist. These two settings cannot be changed in the future. If you find them useless, you have to delete the whole pricelist.
Insert a Name, Internal Name and Description. These fields serve only for your own and BizBox Admin purposes and are never visible to visitors or customers.
Tip
We highly recommend you to fill in description field. It will boost yours and your co-workers orientation and speed of work.
Define Zones for which this pricelist will be active. A customer from a Zone without a defined pricelist will not be able to buy anything on your online store. More pricelists can be defined for one Zone according to your needs.
Gross Price setting determines if the inserted price includes a tax (option YES). If not, the final price (with a tax included) will be calculated automatically. This option will be set as default for particular prices. You can change this setting for every individual price separately.
Set the validity. Active button set to YES will make this pricelist active immediately. You are able to specify the validity date thanks to fields Valid From and Valid Until. Remember - to make this date specification work you have to set the Active button to YES. If the button is set to NO, the pricelist activity is always disabled regardless of the date of specification.
Click the Save button and the base of your pricelist is ready. Now you can price your products, payments, deliveries and handling methods.